 Login
Login Register


Vehicle installation with GGMM
Tools: GTA Garage Mod Manager
Tutorial author: FunGt
The following video shows how to install a vehicle using GTA Garage Mod Manager. This fantastic program is able to replace automatically DFF and TXD into gta3.img. It also replaces settings lines such as handling, carcols, vehicle and carmods. To make this program work you need to copy ggmm.exe and gtainterface.dll into San Andreas main folder. This tool works also with GTAIII and Vice City.

Written tutorial
- Download a car mod and extract the archive where you want.
- Download GGMM and copy ggmm.exe and gtainterface.dll into San Andreas main folder.
- Run GGMM and search the car you are going to replace. Warning: the program will not replace the car you are watching unless the DFF and TXD are called like that car! For example you are watching Landstalker and the mod you downloaded have cheetah.dff and cheetah.txd. The program will replace the Cheetah, not the Landstalker.
- Once you've found the car that the mod replaces, click on Installer>Create backup.
- A backup was made, now click on Installer>Manual mod installer.
- Click on DFF Model and select the dff of the car you extracted in 1st passage (or drag and drop the file).
- Click on TXD Model and select the txd of the car you extracted in 1st passage (or drag and drop the file).
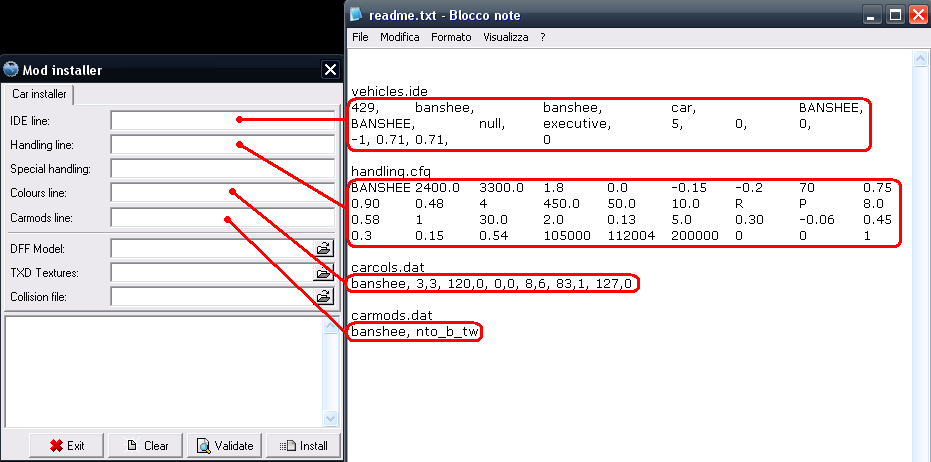
- Open the Readme file of the mod.
- Copy the settings lines you will find and paste them into GGMM window (like this).
- Now click Install button and the car will be automatically installed (watch the log below to make sure everything went good.
- If you want to restore the original car, click Installer>Restore from backup.
C:\Program Files\Rockstar Games\GTA San Andreas\
Advertisements